Create A Simple Html Form With Google Sheets As Database
In this article , we will learn how we can create a simple html form using google sheets as our database. Google Sheets is a spreadsheet program included as part of the free, web-based Google Docs office suite offered by Google within its Google Drive service, Google sheets provide developers various tools to customise and modify google sheets according to their needs. We will use one of these tools to make google sheets as our database.
ApproachStep 1: First of all we will create a simple html form with two fields name,email
<!DOCTYPE html>
<html>
<head>
<title>Simple Form</title>
</head>
<body>
	<center>
      <form id="myform">
		<input type="text" name="Name">
		<input type="email" name="email">
        <input type="submit" value="Send Data">
       </form>
 </center>
</body>
</html>
Step 2: Create a new google sheet
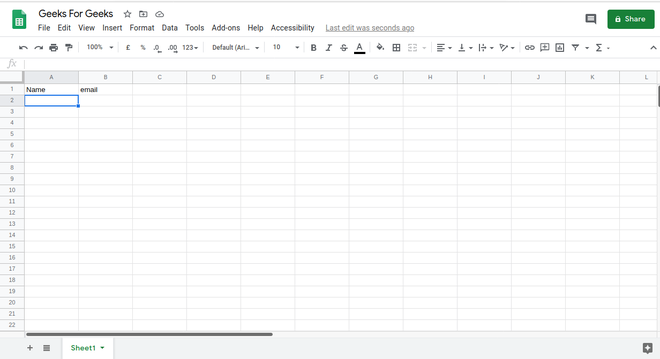
Note: The name of the columns of the google sheets must be exactly same as the name of input in html form.
Step 3: Click on Tools -> Script Editor , after these 2 steps a new window will open with script editor and a default file name code.gs and a default function named myFunction() , clear the entire script editor , then at the top replace 'untitled project' with 'My Form' after that paste the below script in script editor
//  SHEET_NAME is the name of the sheet which is written at the left bottom
//  of the sheet and for new sheet created it's default name is sheet1 so you don't have
//  to change it
        var SHEET_NAME = "Sheet1";


var SCRIPT_PROP = PropertiesService.getScriptProperties(); // new property service

function doPost(e){
  return handleResponse(e);
}

function handleResponse(e) {
  var lock = LockService.getPublicLock();
  lock.waitLock(40000);  // wait 40 seconds before throwing error

  try {
    var doc = SpreadsheetApp.openById(SCRIPT_PROP.getProperty("key"));
    var sheet = doc.getSheetByName(SHEET_NAME);

    var headRow = e.parameter.header_row || 1;
    var headers = sheet.getRange(1, 1, 1, sheet.getLastColumn()).getValues()[0];
    var nextRow = sheet.getLastRow()+1; // get next row
    var row = [];
    // loop through the header columns
    for (i in headers){
        row.push(e.parameter[headers[i]]);
    }
    // more efficient to set values as [][] array than individually
    sheet.getRange(nextRow, 1, 1, row.length).setValues([row]);
    // return json success results
    return ContentService
          .createTextOutput(JSON.stringify({"result":"success", "row": nextRow}))
          .setMimeType(ContentService.MimeType.JSON);
  } catch(e){
    return ContentService
          .createTextOutput(JSON.stringify({"result":"error", "error": e}))
          .setMimeType(ContentService.MimeType.JSON);
  } finally { //release lock
    lock.releaseLock();
  }
}

function setup() {
    var doc = SpreadsheetApp.getActiveSpreadsheet();
    SCRIPT_PROP.setProperty("key", doc.getId());
}Step4: After pasting the above script press ctrl+S and save the above code. After that there will be a drop down to select the function , select setup function from drop down and run the code. After that it will ask for the permissions , some warning will also be thrown , you can ignore that warning and click on go unsafe .
Step5: Click on file and go to manage versions and give your script a version for example let us say version 1.
Step6: Click on edit and select current project triggers(edit -> current project triggers) after that a new window will open.
Step7: Click on add trigger then a new pop up form will open , fill the form with below details
1. choose the function to run : doPost
2. Select event source: From spreadsheet
4. Select event type : On form submit
after filling all these details click on save button.
Step8: After completing step 7 come back to script editing page and click on publish and select Deploy as web app(publish -> Deploy as web app). A pop up form will open, fill the form with below details
1. project version: select version which was created by you in step 5.
2. Execute the app as : Me
3. Who has access to the app: Anyone even anonymous
After filling the form click on deploy. A URL to the app will be displayed copy that URL.
Step9: We will use jquery to send the form data to the web app created in step8, we will create a file named googlesheet.js in same directory in which our html form (created in step1) is present. Copy the below code to googlesheet.js
// Variable to hold request
var request;

// Bind to the submit event of our form
$("#myform").submit(function(event){

    // Abort any pending request
    if (request) {
        request.abort();
    }

    var $form = $(this);

    // select and cache all the fields
    var $inputs = $form.find("input, select, button, textarea");

    // Serialize the data in the form
    var serializedData = $form.serialize();

    // disable the inputs for the duration of the Ajax request.
    $inputs.prop("disabled", true);


    request = $.ajax({
        url: "Your Web App URL",
        type: "post",
        data: serializedData
    });

    // Callback handler that will be called on success
    request.done(function (response, textStatus, jqXHR){
        // Log a message to the console
        console.log("Success ");
        console.log(response);
        console.log(textStatus);
        console.log(jqXHR);
    });

    // Callback handler that will be called on failure
    request.fail(function (jqXHR, textStatus, errorThrown){
        // Log the error to the console
        console.error(
            "The following error occurred: "+
            textStatus, errorThrown
        );
    });

    // Callback handler that will be called regardless
    // if the request failed or succeeded
    request.always(function () {
        // Reenable the inputs
        $inputs.prop("disabled", false);
    });

    // Prevent default posting of form
    event.preventDefault();
});
After pasting the code add the URL of your web app in the above code and then we will add the googlesheet.js to our html form.
<!DOCTYPE html>
<html>
<head>
<title>Simple Form</title>
</head>
<body>
	<center>
      <form id= "myform">
		<input type="text" name="Name">
		<input type="email" name="email">
        <input type="submit" value="Send Data">
       </form>
 </center>
  <script src="https://ajax.googleapis.com/ajax/libs/jquery/2.1.4/jquery.min.js"></script>
  <script src='googlesheet.js'></script>
</body>
</html>

Hurray our html form with google sheets as database is created , now if you want to change the form fields then you don't have to run the google sheets script again simply change the column names in your google sheet(Your google sheet column names must match with your form input field name) and you will be ready to go. If you want to do some more cool stuff with google sheets then you can read the tutorials provided by the google.


Comments
Post a Comment